Masks & Selectors — Workflow
A mask is a grayscale weight (0–1) that tells a node where to act. This guide shows how to build one and wire it in. For what masks and selectors are, see Masks & Selectors (concepts).
The pattern
- Start from a heightmap.
- Run a selector to turn a terrain feature into a 0–1 mask.
- Optionally shape the mask (smooth, remap, combine).
- Wire the mask into the mask input port of a filter or erosion node.
Selectors
Each picks out a feature as a mask (Terrain Features/Selector):
SelectSlope— steep vs flat.SelectAngle— facing direction.SelectGt/SelectInterval/SelectMidrange— by elevation threshold / band / mid-range.SelectPulse,SelectCavities,SelectTransitions,SelectValley,SelectRivers,SelectInwardOutward,SelectBlobLog,SelectMultiband3— feature-specific selectors.
Shaping & combining masks
- Smooth or remap the selector output to soften hard edges before use.
CombineMask— union/intersect/difference two masks (Terrain Features/Mask Operations).ScanMask— inspect/adjust mask coverage.
Applying the mask
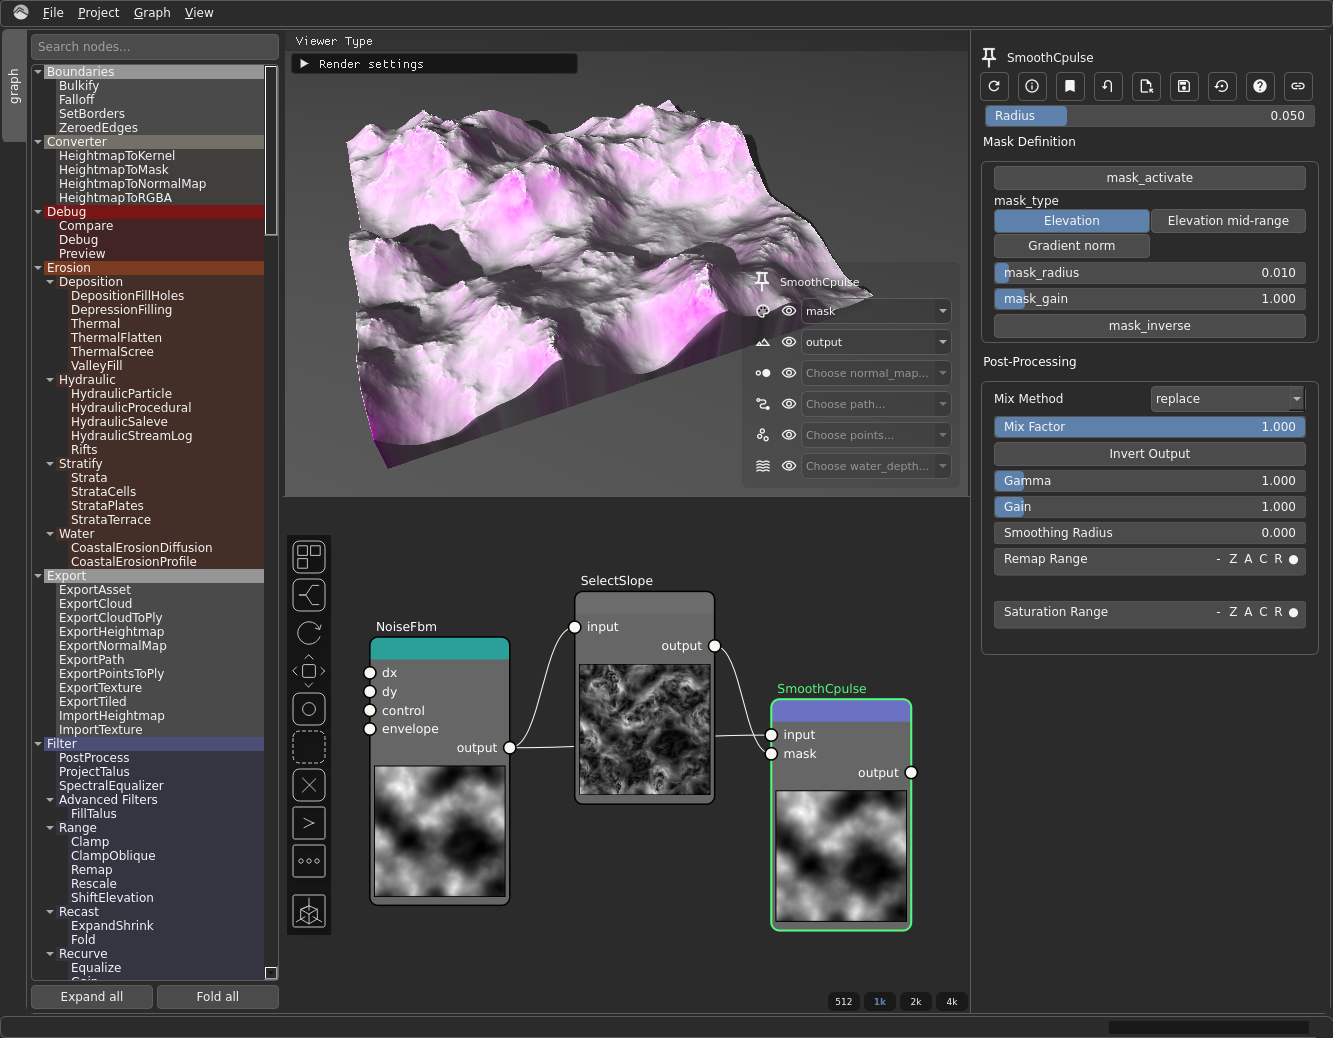
NoiseFbm → SmoothCpulse, with SelectSlope → SmoothCpulse.mask. Source graph: masks-applied.hsd — and masks-unmasked.hsd for the no-mask comparison.
Feed the mask into a node's mask input port — for example, confine
HydraulicParticle to steep terrain by driving its mask from SelectSlope. See
Erosion for masked-erosion recipes and Texturing
for soil masks.